Oh so Glorious Guestbook Ideas!

               Well, as you can see it’s been quite a while since I posted.  I was not trying to ignore you, I promise! I’ve been up to my ears with clients, appointments, design consultations, you name it, but HAVE to post some new research that I found!  When planning a wedding, or any special event for that matter, we like to have something to keep as a memento of the amazing day.  Hence, guestbooks were born! Nowadays, guestbooks don’t just mean that little book with lines on it where guests write well wishes for the couple or guest of the hour.  Now there are many, many other creative ideas that we can use to MAKE SURE that we remember that day for years to come! Some ideas listed below were found in my research, while others are ideas used in It’s all in the Details Events! Enjoy 🙂

1. Traditional Guestbook- some may think this is boring, but it definitely does the trick! (Photo found online-source unknown)

Image

2. Photo book Guestbook- This is a popular one and great because it is personalized to the couple. (Photo via It’s all in the Details)Image

3. Signing a bench- LOVE this one! It’s just so personal and practical.  Just make sure once the bench is signed, a sealant is used to protect the messages. (Photo via It’s all in the Details Event, Tiffany Green Photography)

Image

4. Signing a wooden custom sign or piece of wood- Great for a rustic wedding and great to hang on your wall after the event! (Sign custom made by It’s all in the Details)

Image

5. Wishing Tree- This is great for weddings and all types of special events! Guests write well wishes to the couple or person of the hour and the cards can be bound into a special book after they are hung on a small tree, or hung from anything that fits your party theme! (Photo via Pinterest)

Image


6. Signing a Photo Mat- This is another traditional guestbook idea.  It’s simple and we like it! :(Photo via It’s all in the Details Event)

Image

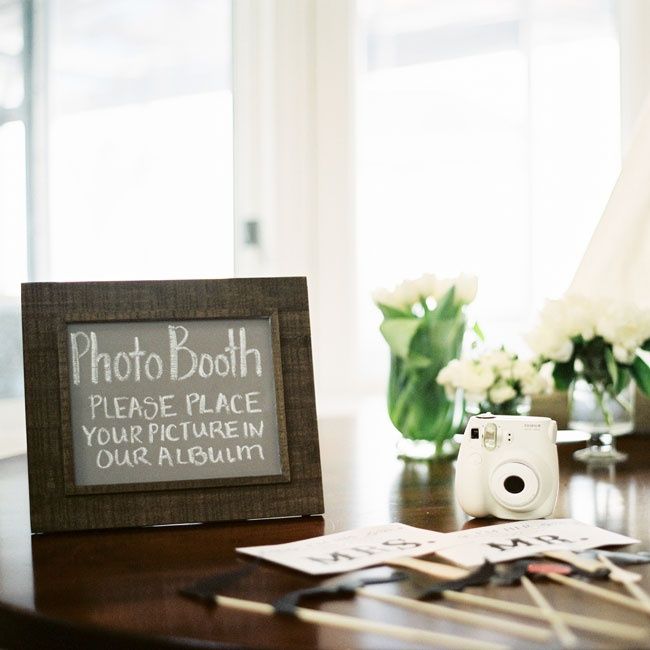
7. Photo booth Guestbook- This is a very popular favorite for most.  Your guests LOVE a photo booth and they love to paste a copy of the photo strip in the book and wish you well! (Photo via pinterest)

Image

8. Anything special that goes with your theme and that you will use as decor in your home! This is great because it can be anything, and we mean ANYTHING! We’ve seen it all- wine barrel, magnum of wine, baseballs for a baseball theme wedding (How cute is this?), puzzle pieces, jenga pieces, a gIobe for your vintage travel theme wedding, I could go on and on! (Photos via Pinterest)

ImageImageImage


ADVICE::: Make sure to ask your DJ to make an announcement to have guests sign the guestbook.  Also, if possible, ask your coordinator to move the guestbook to make sure that it is always easily accessible for your guests.

Make it be something meaningful for you! Otherwise, it will end up collecting dust in a back bedroom until your puppy or baby finds it and rips it to shreds 🙂 Just my opinion!


Enjoy! Until next time 🙂 XOXO, Megs

Monica and Mike Crocker Estate Wedding

Monica and Mike were married at Crocker Estate in Sacramento.  From the moment Monica contacted me, I just knew she was going to be a blast to work with! She loved discussing different designs, until we honed in on that certain inspiration that just fit. Monica was that crafty bride, even creating her own painted and laced mason jar centerpieces!   The beautiful backyard made the perfect backdrop for a wonderful ceremony and reception.  We even designed the sweetheart table and banner especially for this wonderful couple! Absolutely stunning photography by Carmen Salazar Photography.

ImageImageImageImageImageImageImageImageImageImageImage


Congratulations love birds! (You’ll see love bird salt and pepper shakes were another part of their adorable centerpiece)

XOXO, Megan

Decorating a Christmas Tree like a Pro!

Hey  y’all! Sorry, it’s been far too long since my last (and only) blog post.  I’ve been navigating the waters of my first wedding season and have finished my last wedding for the year! This means YAY for several reasons!! One, I have successfully concluded a wonderful first wedding season.  Two, I have a little extra time to start working on my to-do list and roll out some new FANTABULOUS rental items…..and C….  I am now able to focus on a few things at home! I got my Christmas tree up and lit and now have some details to share with you about how I decorate my Christmas tree! Now relax in your favorite chair, next to a roaring fire, sipping hot cocoa (preferably with a little peppermint schnapps 🙂), and enjoy!

1. Decide what you want the feel of your tree to be.  Those who know me, know that I will always have a color coordinated tree.  Whether you choose to color coordinate your tree or just go for that fun, eclectic whimsical tree, there are still several key elements that will make your tree a showstopper!

2. Lighting.  I’m well known for spending hours lighting my tree, wrapping lights around every branch to ensure each branch has the same amount of lights on it.  This looks amazing, but it’s not always necessary, I’ve learned! This year I did not have time, so I wrapped lights around branches as needed and laid lights on top of branches as well (Shocking to those who know me!!) Whether you choose white lights for the elegant feel or colored to create that fun, playful tree, the same branch wrapping will be needed to ensure your favorite playful pup doesn’t get wrapped up in lights and take the tree down with him as he runs away! (No, that has neeeeeever happened!):)

3. Selecting a garland. Garland is used to wrap around or sometimes cascade down the tree from the top.  Garland can be a number of different things.  It can be made of tinsel, beads, glass, sequins , crystals….I could go on and on.  It can even be deco mesh that is used today on a lot of trees, especially commercially.  You can choose a bright color to really pop and make the tree sparkle, or stick with something more neutral like wide burlap ribbon or icy garlands that appear as though they will melt all over your tree (my personal favorite!) It can be hand-made of paper or even cotton balls to appear as snow balls, as seen on my Country Christmas tree in the tree farm photo shoot.  Did you know that traditionally a Christmas tree was adorned with edibles such as apples, nuts, and dates? Hmm…I don’t know what I think of that idea! Pine tree apples don’t sound so appetizing to me..

1462973_592808530768759_1458546555_n

4. Ornaments. Now this is the fun part! Ornaments should be a variety of shapes, sizes, colors, and textures.  Some people create that eclectic tree by using any and all ornaments that represent who they are and what they like.  Some ornaments are sentimental, others are special because you made them! Some reflect a place that you visited, a hobby that you grew up doing, or your first pet.  Others  are personalized with the date of your wedding or your child’s birth date!  This is where my obsession with design comes into play. Here we go….hehe!

                a. Be aware of placement on the tree ie. Don’t place like ornaments together.

                b.  Size.  Smaller ornaments should be at the top of the tree and towards the outside of the branches, while larger ornaments should be placed toward the bottom of the tree and/or inside the tree toward the trunk

                c.  Ornaments should be placed at different locations on the branch, some near the end of branch, some near the trunk.  This creates dimension. MUY IMPORTANTE!

                d.  Those favorite, most beautifully detailed ornaments should be given the best spot on the front of the tree where everyone can ooohhh and awww about how lovely they are! Here’s a few of my favorites!

picstitch

                e. Again, going back to that lovable puppy or young child in your life…..make sure to wrap the ornament hooks around the branch of the tree to secure them very well, we don’t want Spot running off with your favorite ornament!

                f.  Make sure colors are evenly distributed on the tree.

                g.  Look for different textures you can adorn your tree with.  Do you have natural fibers? Sparkles? Glittler? Ornaments both translucent and opaque? Maybe even some feathers? Bows?

                h. Give some ornaments a make-over! Take those drab ornaments and make them your own.  Add ribbon, glitter, and other designs.  Use patterns, monograms, special dates, inside jokes, whatever may be meaningful to you! These are a few that I altered or made!

picstitch(1)

5. Tree Topper. Pick out a tree topper and let your little one put that last piece on the top of the tree…..  Or your dog if you are like me and don’t yet have a little one 🙂

6. HAVE FUN. Turn on that Christmas music or favorite holiday movie, sip hot chocolate or mulled wine (YUM), have fresh cookies baking in the oven, and spend that night with your family or friends!

Thanks for listening to my two cents! Here’s the final product…Excuse the iphone pic…and notice the gifts are also color coordinated with the tree! hehe!

388633_10150510268871340_554209895_n

Enjoy, XOXO Megs

My first blog post!

Hello :)………..Megan here from It’s all in the Details! This is my first time writing a blog, so bear with me as I learn the ins and outs of this amazing online universe!  This blog will be dedicated to my business, where I will post photos and AMAZING details (that you must know) about weddings and events that I do!  This will also be an arena for those things that inspire me to do what I do each day….WHAT I LOVE TO DO EACH DAY!! Welcome and I hope you enjoy my journey as much as I do!